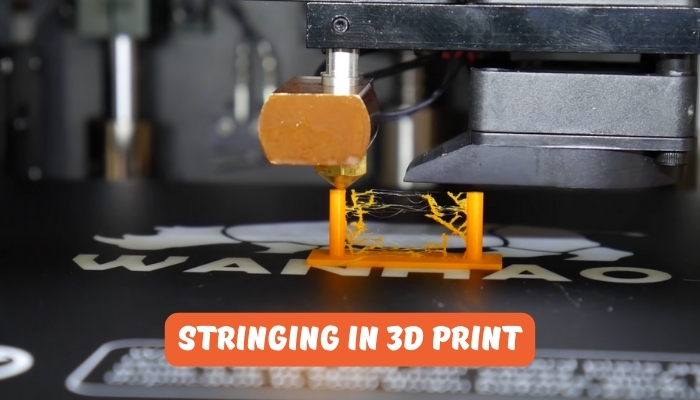
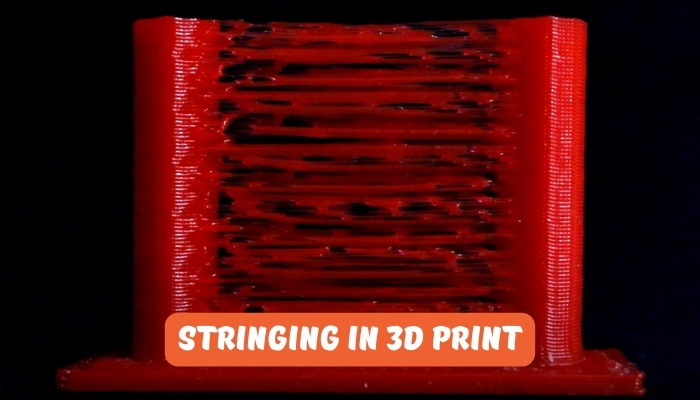
In 3D printing technology, managing travel speed for print head is crucial for achieving high-quality prints. When the print head travels, it can sometimes leave behind strings of filament, a phenomenon known as stringing. This can affect the overall quality and look of the 3D-printed object.
So here in this article, we will cover everything about Travel Speed and its recommended settings.
Now, let’s talk about travel speed first.
Table Of Contents
What is Travel Speed in 3D Printing?
The travel speed in 3D printing is a crucial aspect that often goes unnoticed. It refers to the speed at which the print head moves when not extruding any material. This is a non-print move, meaning the printer is transitioning from one area of the design to another without laying down any filament.

The travel speed can significantly impact the quality of your 3D print. If set too high, it can lead to stringing or oozing, as the filament may not have enough time to cool and solidify before the print head moves. On the other hand, if the travel speed is too low, it can result in a longer print time and potential defects in the print due to prolonged heat exposure.
Let’s have a look at what’s retraction. Another very important term to understand.
What is Retraction in 3D Printing?
Retraction is a feature that pulls the filament back from the nozzle and moves it to a new location. This process helps to prevent oozing or stringing, which are common issues in 3D printing where excess filament leaks out of the nozzle and creates unwanted lines or blobs on the print. By using retraction, you can ensure a cleaner and more precise print.

Travel Speed Setting in Cura 3D Slicer:
Travel settings in Cura refer to the configuration options that control the movement of the print head during non-printing phases, such as moving between print layers or during retraction. These settings can significantly impact the quality of your 3D prints and help prevent issues like stringing and layer separation.

In Cura, there are several settings related to travel speed that you can adjust to optimize your 3D prints. Let’s understand each travel settings one by one.
1. Combing Mode:
Let’s talk about “Combing Mode.” This setting is like your GPS, guiding the print head’s movement within the parts. It has three options: Off, All, and Not in Skin. When it’s off, the print head moves in straight lines, regardless of the model’s boundaries. The ‘All’ option ensures the print head stays within the model’s boundaries, reducing the risk of stringing. ‘Not in Skin’ is a balance between the two, avoiding visible parts of the print (the skin) but moving freely within infill areas.

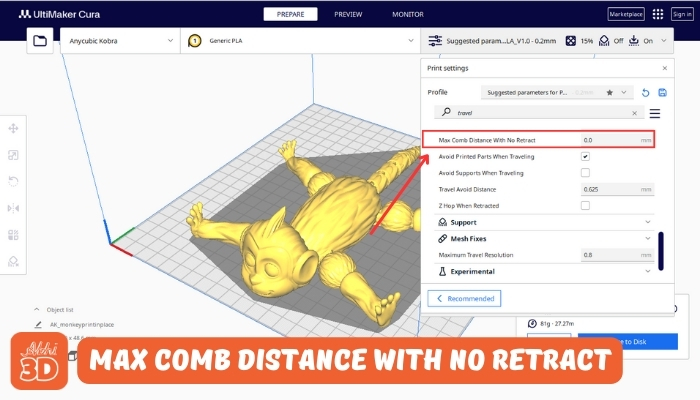
2. Max Comb Distance with No Retract:
Max Comb Distance with No Retract is a feature in Cura that sets the maximum distance the print head can travel without retraction. It’s a balancing act between print quality and speed, optimising your 3D printing process.
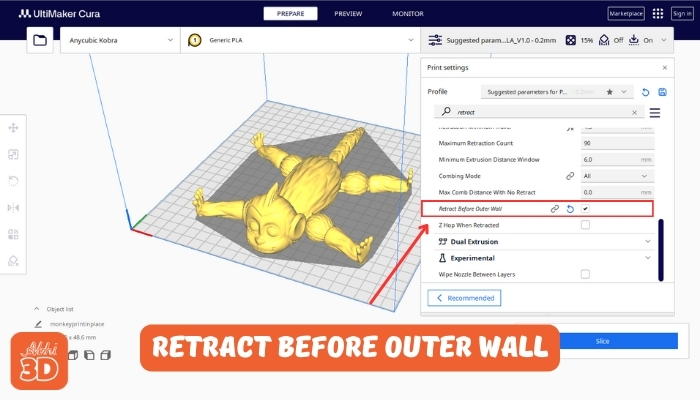
3. Retract Before Outer Wall:
Retract Before Outer Wall setting pulls back the filament before the printer starts working on the outer wall. This helps to reduce any potential oozing and results in a cleaner, more precise print.
4. Avoid Printed Part When Travelling:
Avoid Printed Parts When Travelling ensure the print head maneuvers around already printed sections, minimizing the risk of damage or displacement.

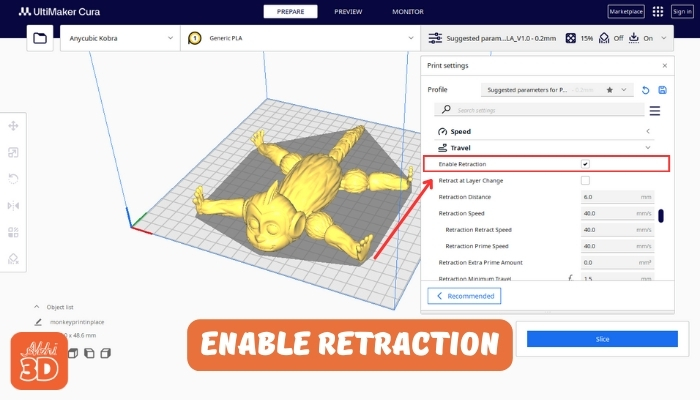
5. Retraction Setting:
It pulls the filament back when the print head moves between parts, reducing stringing. You can adjust the retraction distance (how far the filament is pulled back) and retraction speed (how fast it’s pulled back).
6. Retraction Minimum Travel:
Retraction Minimum Travel setting determines the minimum distance the print head should travel before a retraction is triggered. This helps to reduce stringing and improve print quality.

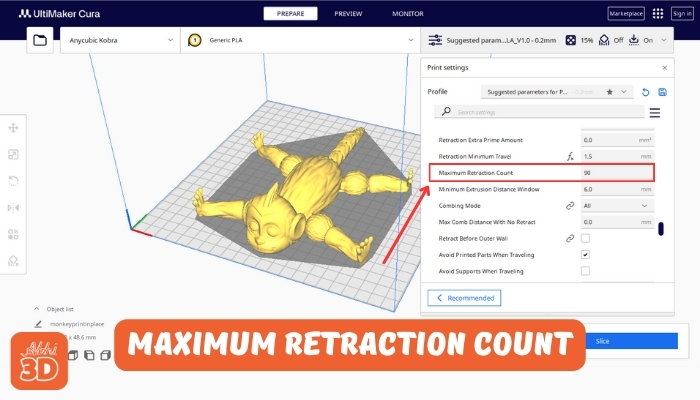
7. Maximum Retraction Count:
This setting limits the number of times the filament can retract within a specified distance, helping to prevent filament grinding and other issues.
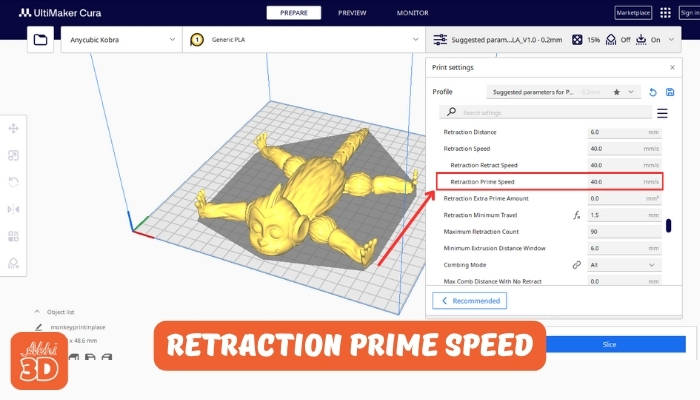
8. Retraction Prime Speed:
Retraction Prime Speed controls the speed at which the filament is pushed back after a retraction, ensuring smooth and precise printing.
9. Z Hop Setting:
When enabled, the print head lifts slightly when it travels, reducing the chance of it knocking into and damaging the print.

10. Z Hop When Retracted:
Z Hop When Retracted is a 3D printing setting that slightly lifts the print head during retraction, reducing the risk of scraping or damaging the print.
11. Z Hop Only Over Printed Part:
Z Hop Only Over Printed Parts ensures the print head only lifts (or ‘hops’) when moving over already printed areas.

12. Z Hop Height:
Z Hop Height dictates the vertical distance the print head lifts during a Z hop, optimising print quality.

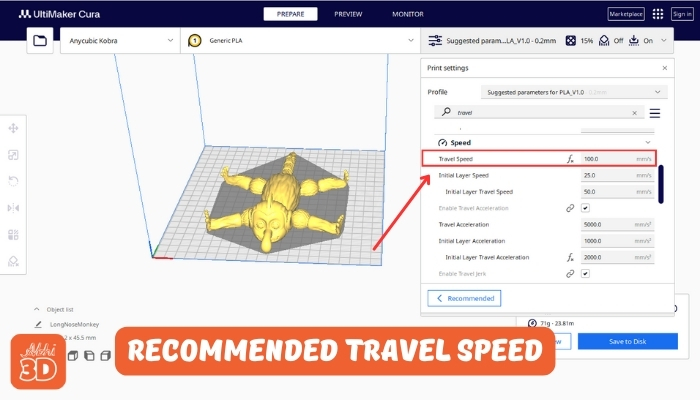
Recommended Travel Speed in Cura:
Now, onto the recommended settings. Generally, a good starting point for your travel speed in Cura is around 100 mm/s. This moderate speed allows for efficient printing without compromising on quality.
However, this isn’t a one-size-fits-all solution. Depending on your printer’s capabilities and the complexity of the model you’re printing, you might need to adjust this speed.
If you’re noticing stringing or oozing in your prints, it could be a sign that your travel speed is too slow. In this case, try gradually increasing the speed. On the other hand, if your printer is struggling to keep up or the movements seem jerky, you might need to reduce the travel speed.
Travel Speed FAQ (Frequently Asked Questions):

The best retraction distance again varies depending on the type of 3D printer and filament you’re using. However, a good starting point for many printers is around 5mm for Bowden extruders and 2mm for direct drive extruders. It’s important to note that these are just starting points and you may need to adjust the retraction distance for optimal results.